Xilinx Virtual Cable and FT2232
Xilinx Virtual cable (XVC) is a TCP/IP based protocol which emulates JTAG protocol and acts like a JTAG cable over network. Xilinx Virtual Cable provides a way to access JTAG chain on the target FPGA board and debug the target without the need of a physical cable. While it is designed to be used over network where USB or serial cables cannot be run directly, XVC can be used to access JTAG chains on Xilinx FPGA based boards connected locally with appropriate software to act as a bridge between XVC and the hardware. Thanks to [tmbinc] at http://debugmo.de/, such a software already exists that can bridge XVC with FT2232H based devices. Saturn Spartan 6 FPGA Module do have an onboard FT2232H device that can be configured to access the FPGA’s JTAG chain. This makes Saturn capable of working with tmbinc’s daemon for bridging XVC and FT2232H. By properly configuring the daemon and XVC, iMPACT and Chipscope can be used with Saturn without purchasing an expensive Xilinx USB Platform Cable.
How to use Saturn Spartan 6 Module with XVC
Prerequisites
Hardware:
Software:
- Xilinx ISE installed
- FTDI D2XX Drivers installed
- Python installed
Steps
- Download ‘playtag’ source from https://github.com/pmaupin/playtag repository. [Zip URL]
- Extract it to any location of your choice. We extracted it to ‘playtag-master’ in Downloads folder.
- Open command prompt and navigate to the folder where you extracted it.
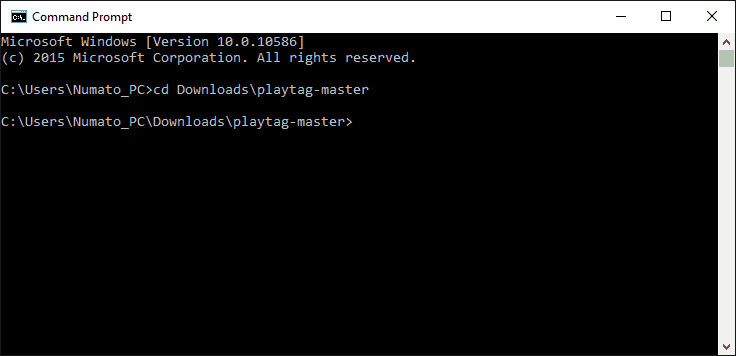
- Further navigate to ‘tools\jtag’ folder inside the ‘playtag-master’ folder. It should contain 3 files: discover.py, loadsvf.py and xilinx_xvc.py
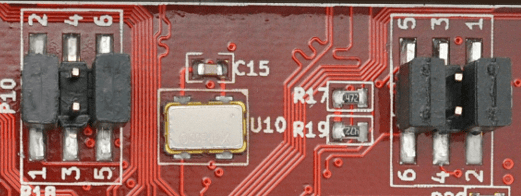
- Now, before doing anything else, we need to make sure our Saturn’s jumper configuration is correct. By default, Saturn comes with a different configuration like shown in pic below:
 The above image shows jumper configuration for SPI. We need to change them to JTAG configuration. So, now connect the jumpers as shown in the below pic from Saturn’s datasheet:
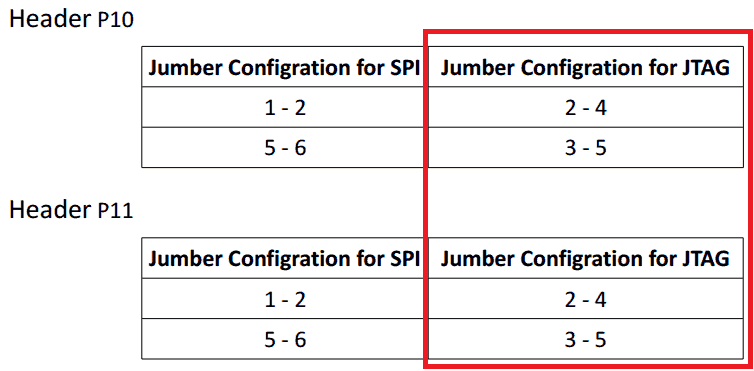
- Connect the Saturn board to your computer using USB mini Cable.
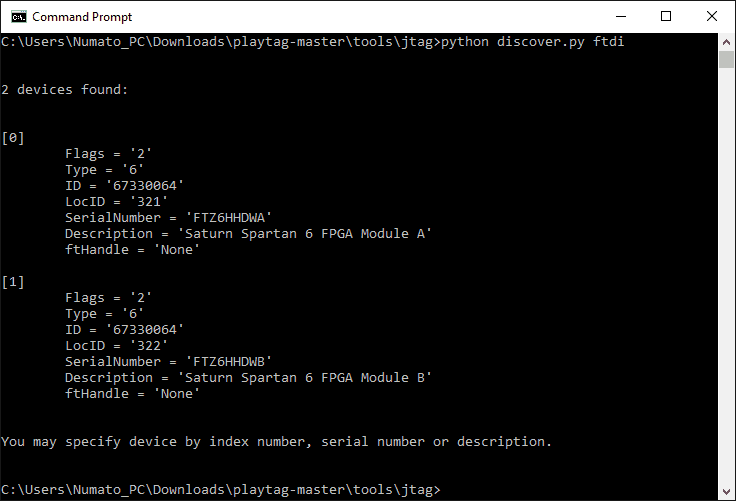
- In the command prompt window we have opened, type and press enter: ‘python discover.py ftdi’ It will give an output something like the image below. Here we are seeing 2 devices because Saturn’s FTDI has 2 independent channels. But, it’s the first channel which is actually connected to FPGA’s JTAG lines. So we will be using Device [0].
- Now type and enter: ‘python xilinx_xvc.py ftdi 0’ Here 0 refers to Device [0] mentioned before. The output should be something like this now:
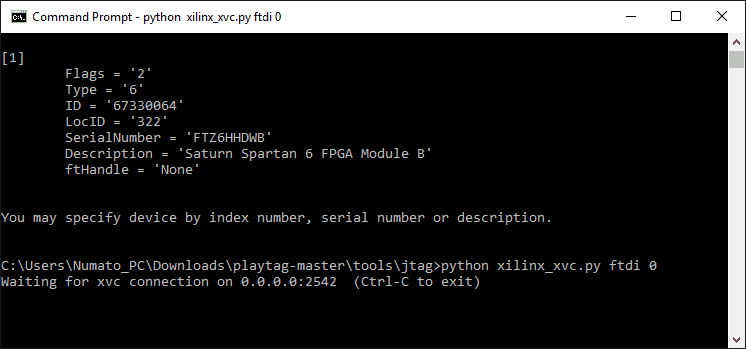 Congratulations, our first step is done. Server is now waiting for connections from Xilinx Virtual Cable driver. Leave this command prompt as is (i.e, don’t close it) and let’s go to iMPACT now.
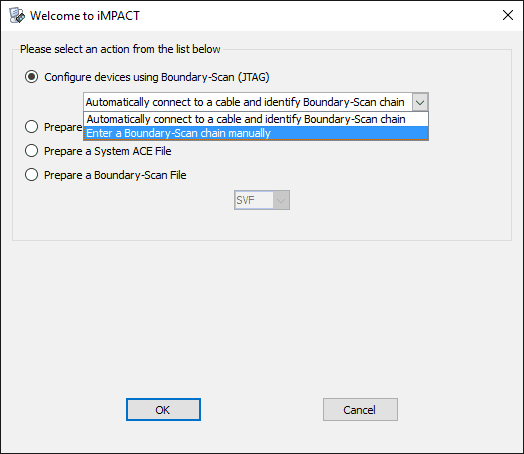
 - Open iMPACT and create a new project, or select “Yes” when iMPACT asks upon starting whether to “Automatically create and save a project”. In the dialog window select “Enter a Boundary-Scan chain manually” and click OK:
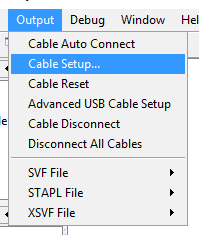
- Go to menu Output -> Cable Setup :
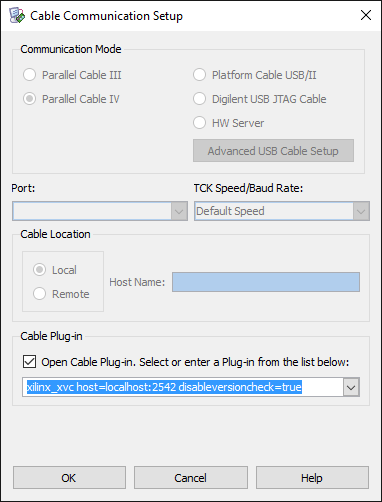
- In the dialog window that opens, check “Open Cable Plug-in” option and enter “xilinx_xvc host=localhost:2542 disableversioncheck=true” and Click OK
- As soon as you click OK, in the command prompt window that we had left open, it should notify about a new connection, like in the image below:

- Now, you can go back to iMPACT, Right click and “Initialize JTAG chain”. It should show the FPGA present on the Saturn board. iMPACT will ask whether you want to assign configuration files (i.e, .bit files). Choose ‘Yes’ and browse to your .bit file generated by ISE after design implementation. Open the bit file. Choose ‘No’ when iMPACT asks about SPI or BPI PROM files and finally click ‘OK’.
- Right click on the FPGA icon showed in iMPACT and click ‘Program’. iMPACT should now begin programming the FPGA on the Saturn Board. Once done, it should show ‘Program Succeeded’ in blue.

That’s it! You have successfully used Xilinx Virtual Cable driver to program Saturn via iMPACT! Great job! Try using your Saturn with Chipscope too!
References:
Did you ever see strange visual effects in Chipscope when doing this? More often than not, I get waveforms which appear completely garbled, like channel data streams getting mixed together. Almost like some kind of synchronization problem. It’s extremely frustrating and I have not found a reliable way to avoid it.
September 28, 2017 at 3:35 pmHi Aari,
We haven’t used Chipscope with this yet and I’m not able to guess what might be the issue here apart from host daemon. Might be better to test with xvcd also? https://github.com/RHSResearchLLC/xvcd (Do check the upstream repo of this fork also)
October 3, 2017 at 3:44 am