
Introduction
| Sl.No. | SKU | Description | Relay Type |
|---|---|---|---|
| 1 | NLEWR008A | LEO WR 8 Channel Web Relay Module - WR8A | SPST |
| 2 | NLEWR008A-24 | LEO WR 8 Channel Web Relay Module - WR8A-24 | SPST |
| 3 | NLEWR008B | LEO WR 8 Channel Web Relay Module - WR8B | SPDT |
| 4 | NLEWR008B-24 | LEO WR 8 Channel Web Relay Module - WR8B-24 | SPDT |
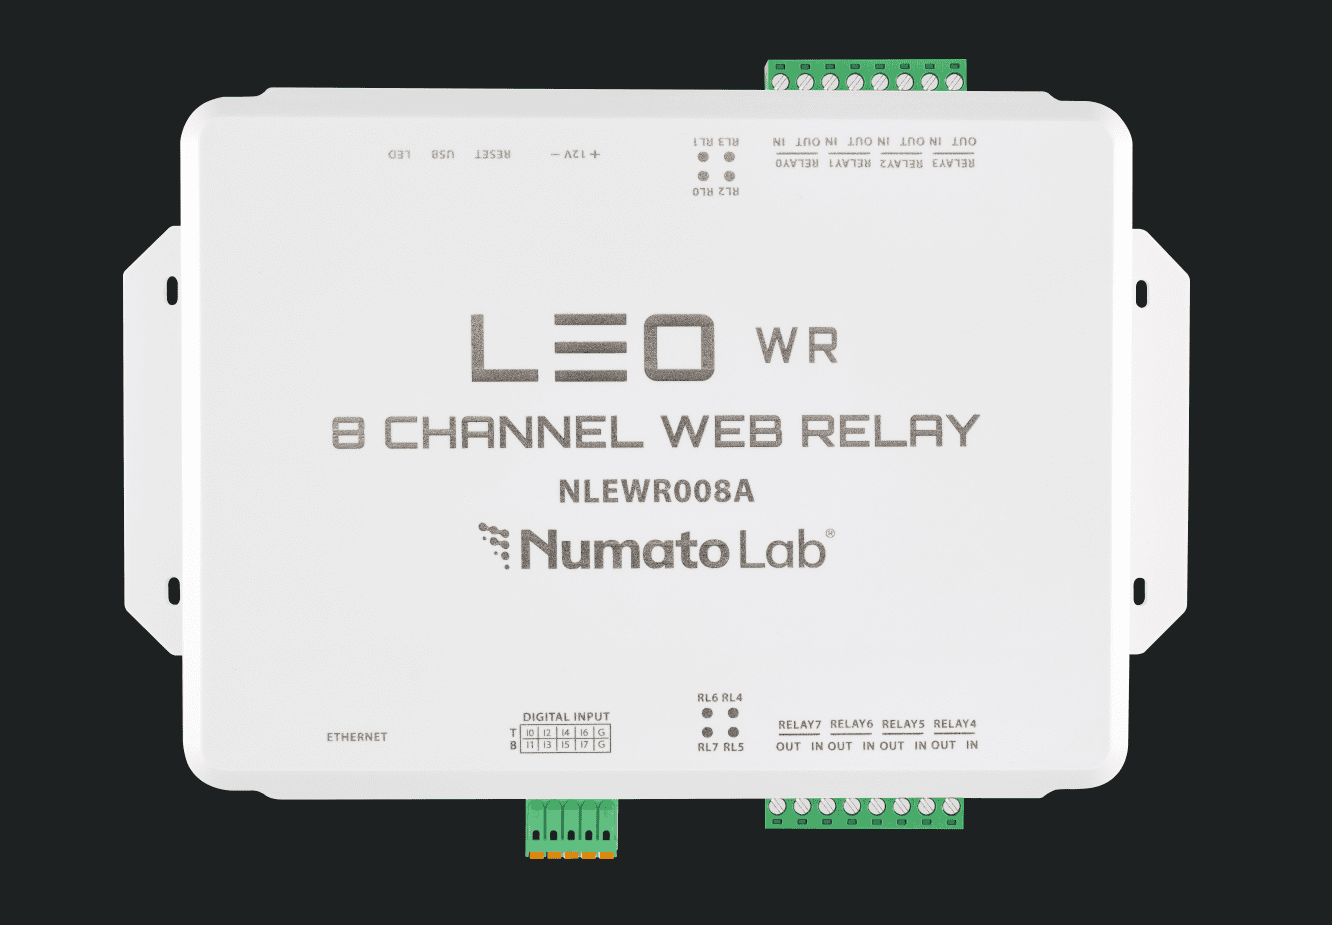
The Numato Lab LEO Web Relay Module is a network-enabled relay controller designed for remote control, monitoring, and automation of electrical and electronic devices.
LEO is available in multiple channel configurations, making it suitable for applications ranging from small-scale control systems to larger industrial and automation setups. Depending on the model, the device provides multiple relay outputs and digital inputs, with Ethernet and 2.4 GHz Wi-Fi connectivity.
The device can be operated through a password-protected Web Interface or integrated with custom applications using REST API, Telnet, or MQTT/MQTTS. Built-in automation features enable relays to be controlled based on configured conditions, timers, and fail-safe requirements.
The LEO Web Relay Module is suitable for industrial automation, IoT applications, remote equipment control, testing, and smart automation systems.
Key Features
- Multiple Relay Outputs: Available in different channel configurations to suit various control and automation requirements. Relay types and contact ratings depend on the model.
- Digital Inputs: Monitor external signals and equipment through available high-voltage digital inputs.
- Relay Status Indication: LEDs provide visual indication of relay status on supported models.
- Rule-Based Automation: Create local automation rules to control relays based on configured conditions and events without requiring a host PC or cloud connection.
- Relay Timer: Configure relays to turn ON or OFF automatically for a specified duration or at configured intervals.
- Fail-Safe Operation: Configure predefined relay states and actions for safe and predictable operation during communication or system failures.
- Ethernet: Provides wired network connectivity for device access and control.
- 2.4 GHz Wi-Fi: Provides wireless connectivity for remote monitoring and control.
- Web Interface: Provides password-protected access for device configuration, relay control, and monitoring.
- REST API: Enables integration with custom software and automation applications over Ethernet and Wi-Fi.
- Telnet: Provides command-line access for relay control and device configuration over Ethernet.
- MQTT/MQTTS: Enables integration with MQTT-compatible IoT and cloud platforms for remote monitoring and relay control over Wi-Fi.
- USB-C: Provides local access and configuration without requiring a network connection.
- DIN Rail Mounting: Supports standard DIN rail installation for convenient deployment in control panels and industrial environments.
- RGB Status Indicator: Provides a visual indication of the device’s operating status.
What's in the Box
Your Numato LEO WEB Relay package includes:
- LEO WEB Relay Module.
- LAN Cable.
- USB-C Cable.
Note: A suitable DC power supply is required to power the LEO WEB Relay Module and is not included with the package.
Getting Started with LEO WEB Relay Module
The LEO Web Relay Module is shipped in Application Mode with DHCP enabled by default, so no initial network configuration is required.
Step 1 – Connect Power
- Connect a suitable DC power supply to the LEO Web Relay Module.
Step 2 – Connect Ethernet
- Connect the supplied LAN cable between the Ethernet port on the LEO Web Relay Module and your network.
- The device automatically obtains an IP address from the network using DHCP.
Step 3 – Check the LED Indication
- Check the device LEDs to confirm the device and network status.
Refer to LED Indication for the meaning of each LED status.
Step 4 – Access the Web Interface
You can access the LEO Web Relay Module using its hostname, so you do not need to know its IP address.
The device hostname is printed on the label on the back of the LEO Web Relay Module.
- NET0 — Ethernet
- NET1 — Wi-Fi
Open a web browser on a computer, laptop, or mobile device connected to the same network and enter:
http://<hostname>.local
For example:
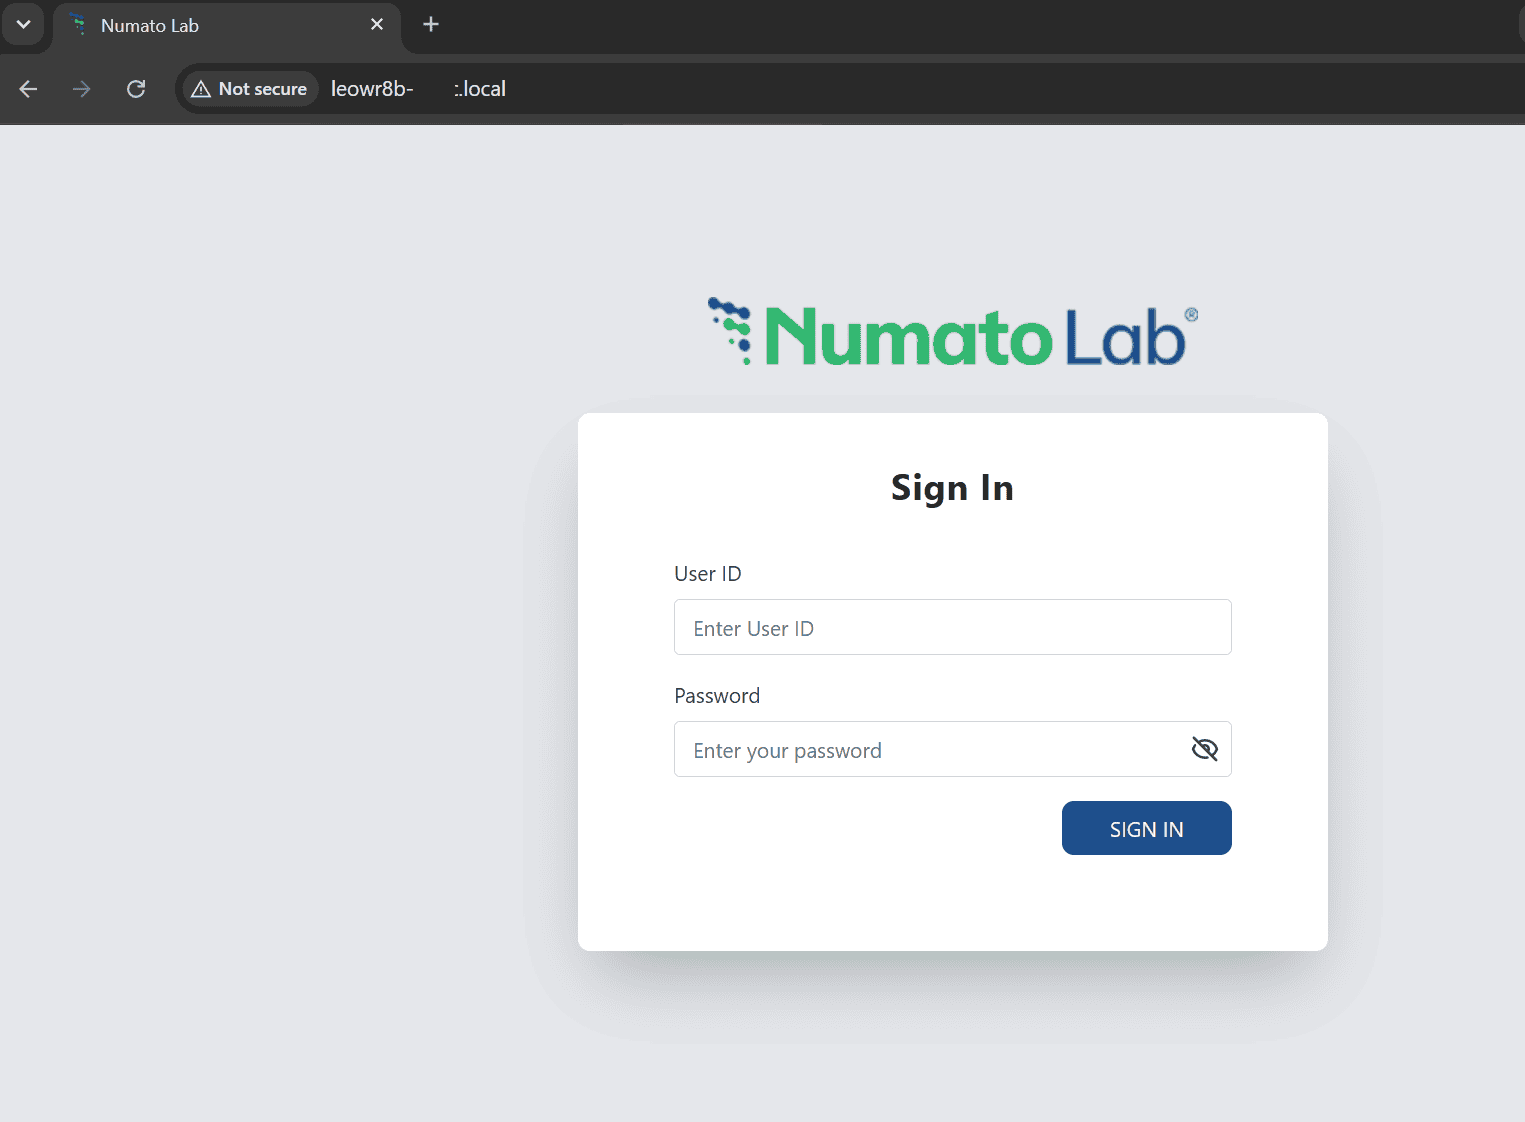
Log in to the Web Interface using your device credentials. Default credentials are as follows:
- Username: admin
- Password: admin1234
You can now control the relays and monitor the digital inputs.
Need the Device IP Address?
If you need to know the IP address assigned to your LEO Web Relay Module, you can view the network details through the USB console.
- Connect the USB-C cable between the LEO Web Relay Module and your computer.
- Keep the Ethernet cable connected to the network.
- Open a serial terminal on your computer.
- Power-cycle the LEO Web Relay Module.
- The device network details will be displayed on the USB console.
The displayed information includes:
- IP address
- Subnet mask
- Gateway
- Hostname
You can use the displayed IP address to access the Web Interface.
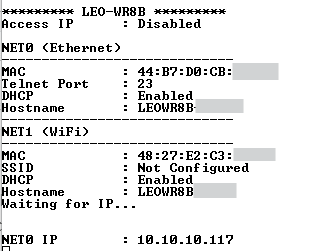
Note: You do not need the IP address for normal access. You can use the device hostname as described in Step 4 – Access the Web Interface.
Need to Change Network Settings
The LEO Web Relay Module is shipped in Application Mode and is ready to use after connecting power and Ethernet.
If you need to change the Ethernet or Wi-Fi settings, switch the device to Configuration Mode.
You can enter Configuration Mode using either the Web Interface or Telnet.
Using the Web Interface
- Log in to the LEO Web Relay Web Interface.
- Open the Reboot section.
- Select Configuration Mode.
Using Telnet
- Connect to the LEO Web Relay using Telnet.
- Log in to the device.
- Enter the “config mode” command.
See the Telnet Interface in the User Manual for the available Telnet commands.
Configure the Network
In Configuration Mode, you can configure settings such as:
- DHCP or Static IP
- IP address
- Subnet mask
- Gateway
- DNS
- Wi-Fi SSID
- Wi-Fi password
After completing the configuration, switch the device back to Application Mode to resume normal operation.
For detailed configuration instructions, see the LEO Web Relay User Manual.
LED Indication
The LEO WEB Relay module provides visual feedback through the onboard LED indicator:
- On Power-On
- Device Reset
- Factory Reset
- Network Status
| LED Indication | Status |
|---|---|
| Solid Red | USB configuration mode |
| Blinks in Blue Colour | Trying to connect to network |
| Solid Purple | Connected to Ethernet network |
| Solid Turquoise Blue | Connected to Wi-Fi network |
| Solid Blue | Connected to both Ethernet and Wi-Fi |
| Blinks in Red Colour | Factory reset in progress |
What's Next?
Your LEO Web Relay Module is now ready for use.
For detailed information about device configuration, automation, communication interfaces, APIs, commands, troubleshooting, and technical specifications, refer to the LEO Web Relay User Manual.
| Sl.No. | User Manual | Description |
|---|---|---|
| 1 | NLEWR008A | LEO WR 8 Channel Web Relay Module - WR8A |
| 2 | NLEWR008A-24 | LEO WR 8 Channel Web Relay Module - WR8A-24 |
| 3 | NLEWR008B | LEO WR 8 Channel Web Relay Module - WR8B |
| 4 | NLEWR008B-24 | LEO WR 8 Channel Web Relay Module - WR8B-24 |